In the 20+ years I’ve been running tabletop RPGs, there has always been one facet of the classic dungeoncrawl/hexcrawl game I’ve struggled with: mapping. Or, more precisely, conveying the information on my DM map to the players. I’m sure you’re familiar with the situation.
DM: “The door creaks open with the piercing scream om metal grinding against metal, and the scent of mould and decay rolls out at you from the dark depths of the chamber ahead… In the sputtering light of your torches, you can spy eight bodies chained to the crumbling walls – all in various states of decay. The wind…”
Player: “Hold up – how big is this room, you’d say?”
DM : “It’s fairly large. Now, the wind…”
Player: “I need to know the approximate dimensions for our map.”
DM:– “Eh, about thirty by fifty feet. The wind picks up…”
Player: “Wait, that makes no sense – that means it clips the throne room…”
DM : “No, this room has an inward-curving wall.”
Player: “How much of a curve? Can you describe it?”
I’m sure most of you have been there. Mapping—even if you practise a less strict version than the one used in the example above—eats up game time. It’s essentially dead time—the DM tries to describe his vision of the game world more or less accurately to one player, while the others wait. Whether it takes a long time or not, it means a break from the game. Doubly so if any instructions are misinterpreted and need re-explaining.
And it can be frustrating for the players when they make a stupid mistake and feel it’s not something they would have messed up in real life. I’ve tried a lot of things to avoid or mitigate the hassle of mapping: using abstract systems; using very simple maps; using 3D maquettes, providing the players with a map, but nothing really helped.
There was one other option left, but it was an expensive one: hook up a large flatscreen to a laptop running Photoshop. Then open the map in PS and use layers to reveal only what the PCs can see. Ideally, you can also embed such a flatscreen into your gaming table and cover the screen with a sheet of plexiglass, so you can use it as a battlemat. Perfect, yes. But expensive in terms of both money and space. There had to be a better solution out there.
As luck would have it, there is.
When preparing for our Curse of Strahd campaign, I found myself once again pondering over the mapping conundrum. At first, I was ready to simply give in, and provide the players with the map of Barovia beforehand.
In order to make it easy for them to make notes on the map itself, I decided to laminate it and use dry-erase markers. And then it hit me. Being a miniatures painter, I had some 15+ cans of acrylic spray paint sitting in my cupboard. I took out the Uniform Grey (seemed to resemble the dreaded Mists quite nicely), gave the freshly-laminated map a nice, even coat, and let it dry.
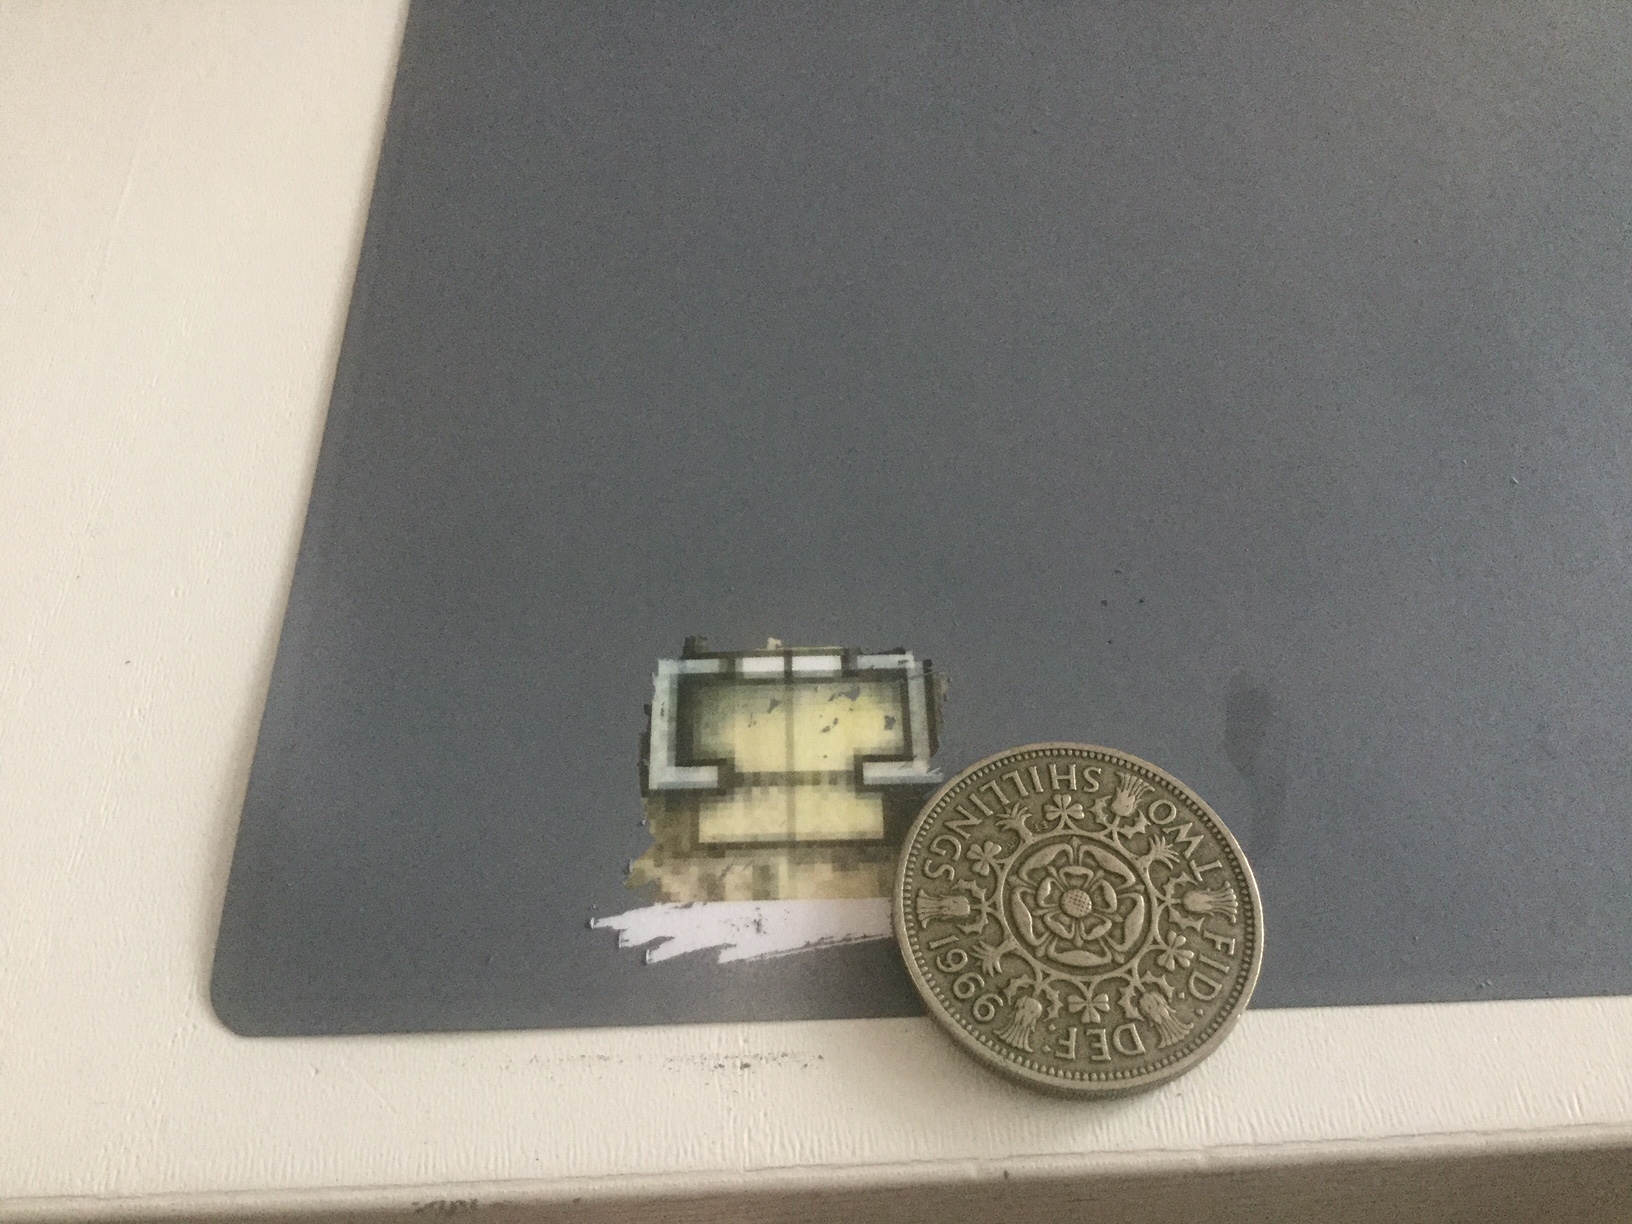
After an hour or so, I took a dull knife and carefully scratched away the paint on the Eastern edge—the Old Svalich Road, where the PCs enter Strahd’s domain. Success! The paint came off almost without effort to reveal the beautifully illustrated map beneath. Happy with the result, I decided to use it for the game that night. And so, when the PCs entered Barovia, I handed them my scratch-away map and the blunt knife. “Where you scratch, is where you go…”
It was a complete success.
No more wasting time describing exact distances and dimensions. No more repeating stuff. And best of all: everybody was involved in the process of exploration, sitting in rapt attention as they listened to my descriptions while the ‘mapper’ revealed the next section.
For dungeons, I did the same thing and let the players scratch away within the radius of their torchlight as they explored. It was the perfect solution: a portable version of the flatscreen setup with all its benefits, costing several thousand dollars less (barely $2 per map).
So, how do you do it?
How to Create Your Own Scratchaway Maps
To make you own scratchaway maps, you’ll need:
- A laminator. If memory serves, I purchased mine for around $20, including 100 A4 size plastic sleeves.
- A can of spray paint. I recommend Army Painter colour primers for quality, choice of colours, and the simple fact that I know it works. Feel free to experiment with different types and brands, though I’d stay away from lacquer paints. One can set you back around $15 and will serve to coat many maps.
- A map, obviously. Draw your own, copy from a module or purchase online. I got mine from Mike Schley, the artist who designed the maps for Curse of Strahd and Tomb of Annihilation, among others. You can buy them for a few dollars online. Be sure to print your maps on a paper size that fits your laminator.
Tip: I do not recommend scaling your maps to 1” squares. Likely, you’ll end up with several pieces for a single map and far too much paint to scratch away, which makes scratching a tedious affair. Your scratch away maps serve to facilitate exploration and mapping—don’t think of them as battlemats.
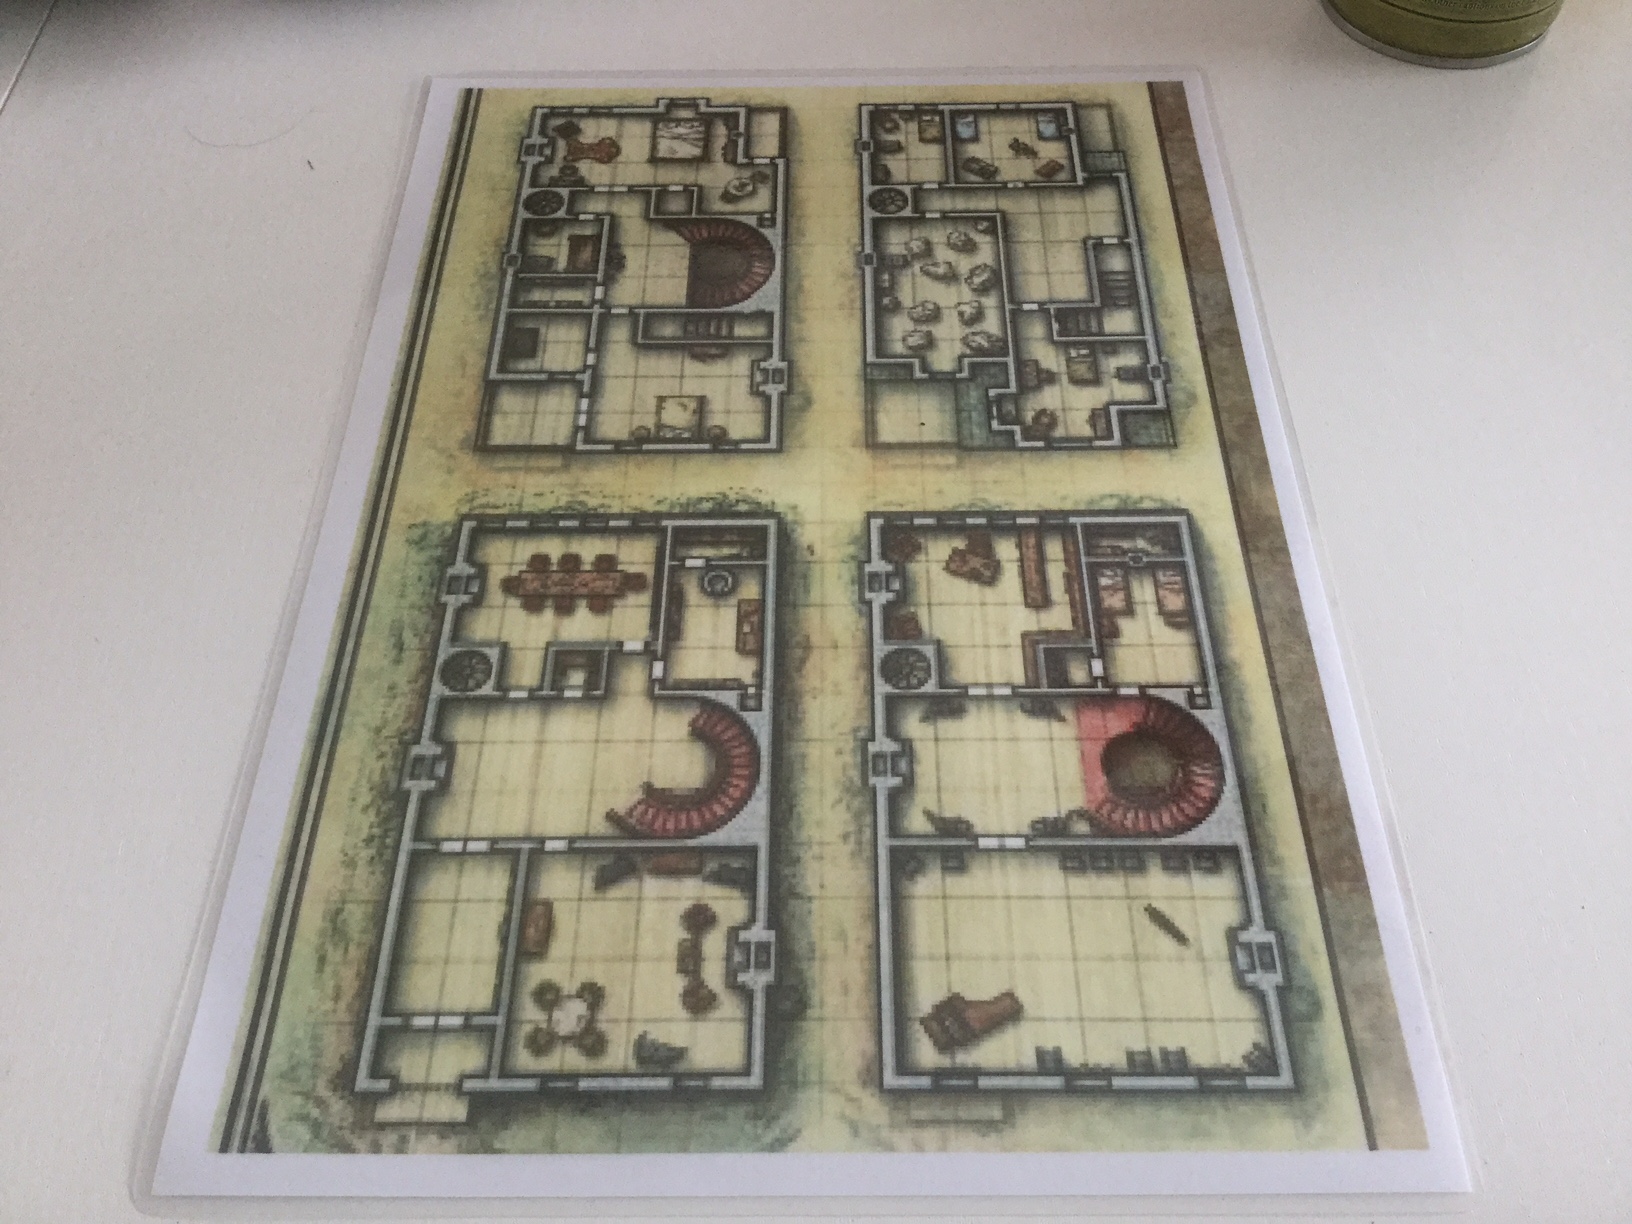
1. Laminate Your Map
Follow the instructions on your laminator and laminate the maps you printed earlier. You should end up with a nicely laminated sheet like this one:
2. Apply Spray Paint
Spray paint should always be used in a well-ventilated area. Take care to avoid collateral damage and cover anything nearby that you do not want to see coated in paint! Shake the can for about two minutes. Then, from about 20 to 30 cm away, apply a thin, even coat of paint.
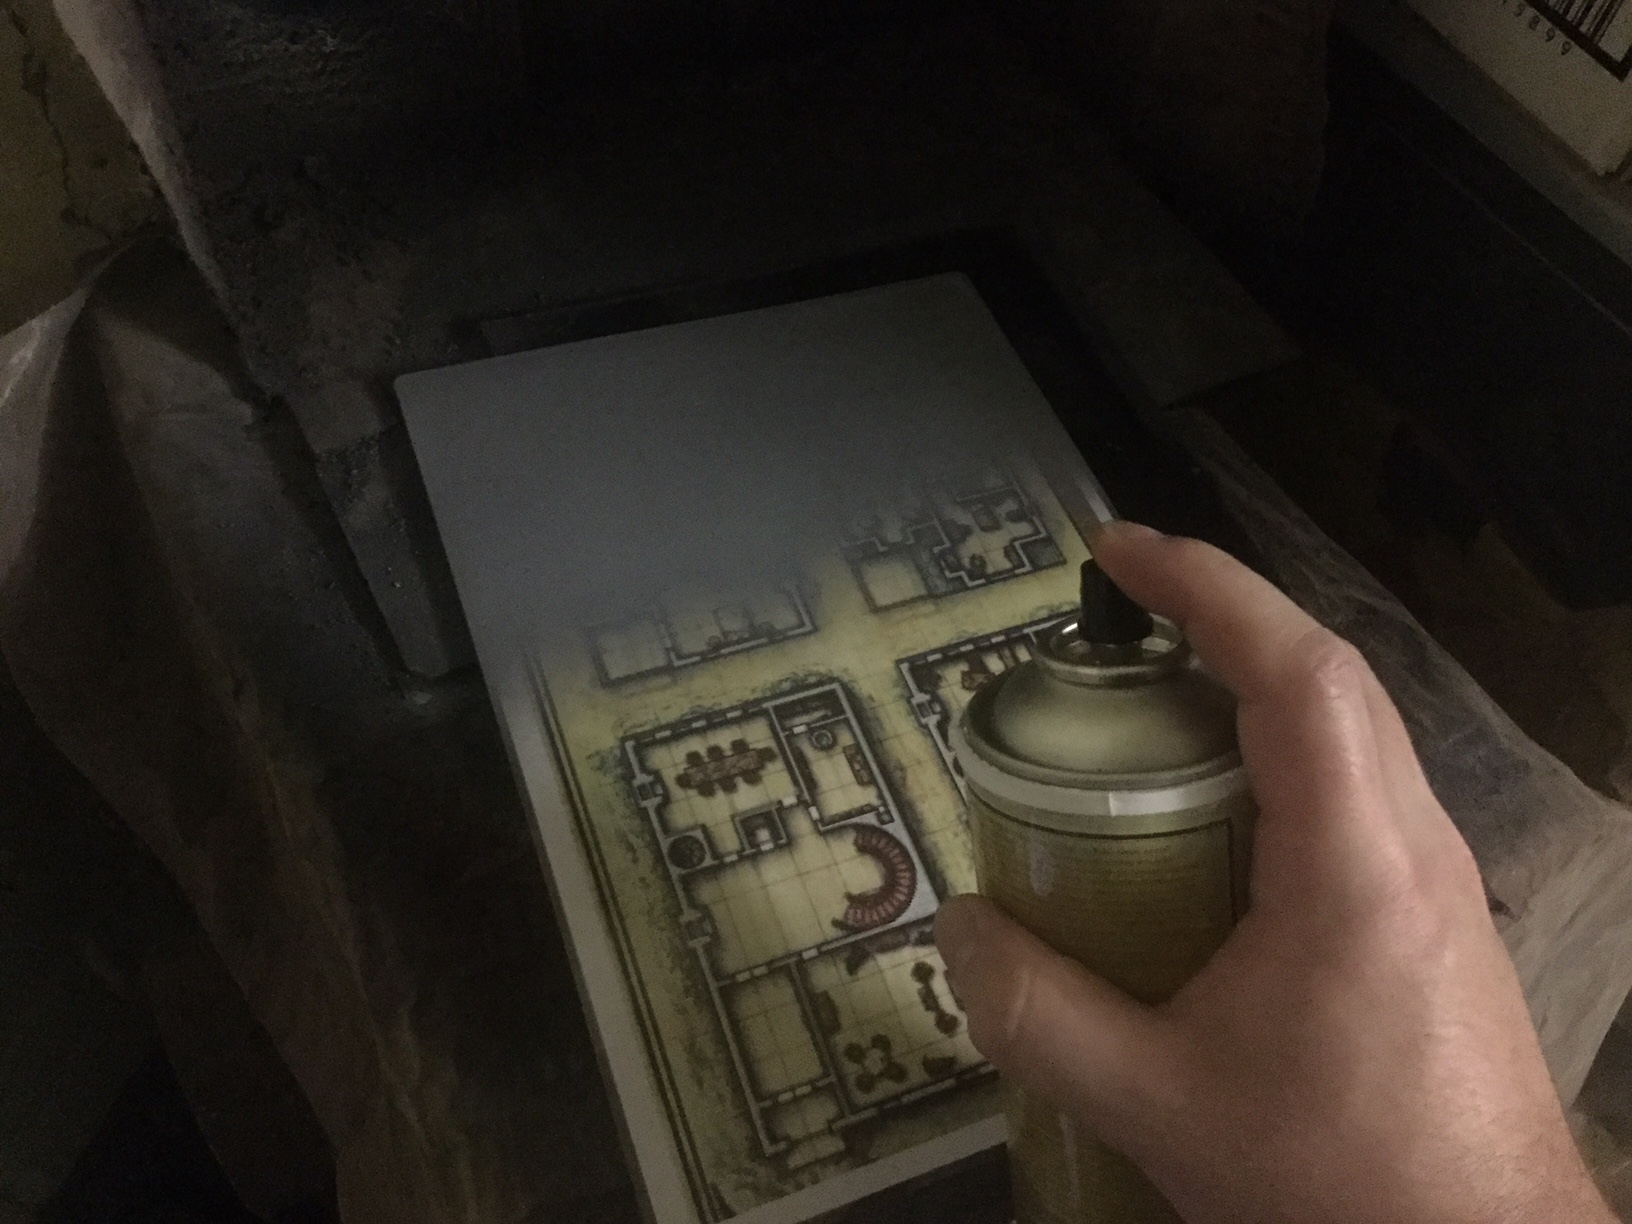
Tip: Remember where the map’s entry points are! You’ll need to keep these clear of paint so the players can at least see where they start. Use a bit of masking tape, or simply avoid certain areas when applying the paint.
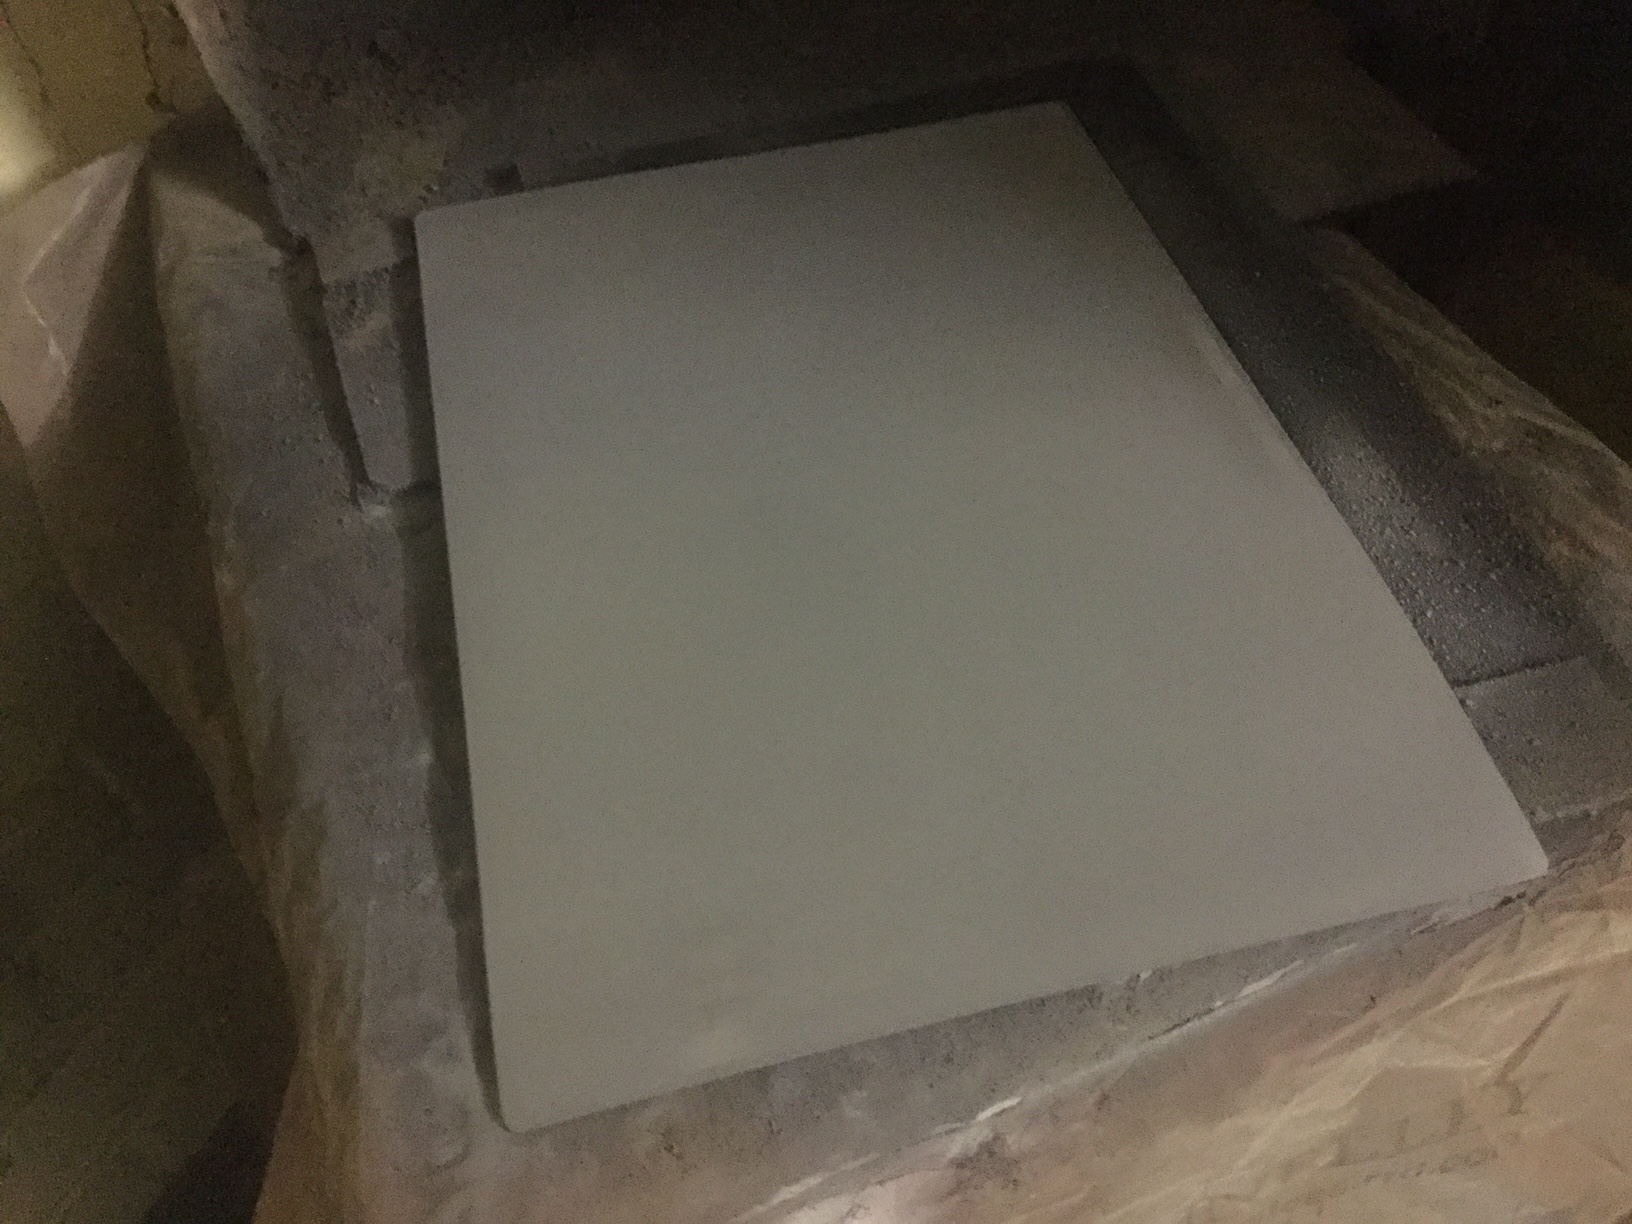
3. Allow to Dry
This shouldn’t take too long—about 15 minutes should do the trick. In the picture below, notice how I only lightly coated the entry to the ground floor in the bottom left corner, so it remains slightly visible.
4. Scratch Away!
You can now start scratching off the paint to reveal the starting area. As I mentioned above, you can use masking tape too. The paint should come away cleanly and easily using a coin or a blunt knife.
Repeat—as the party explore the area!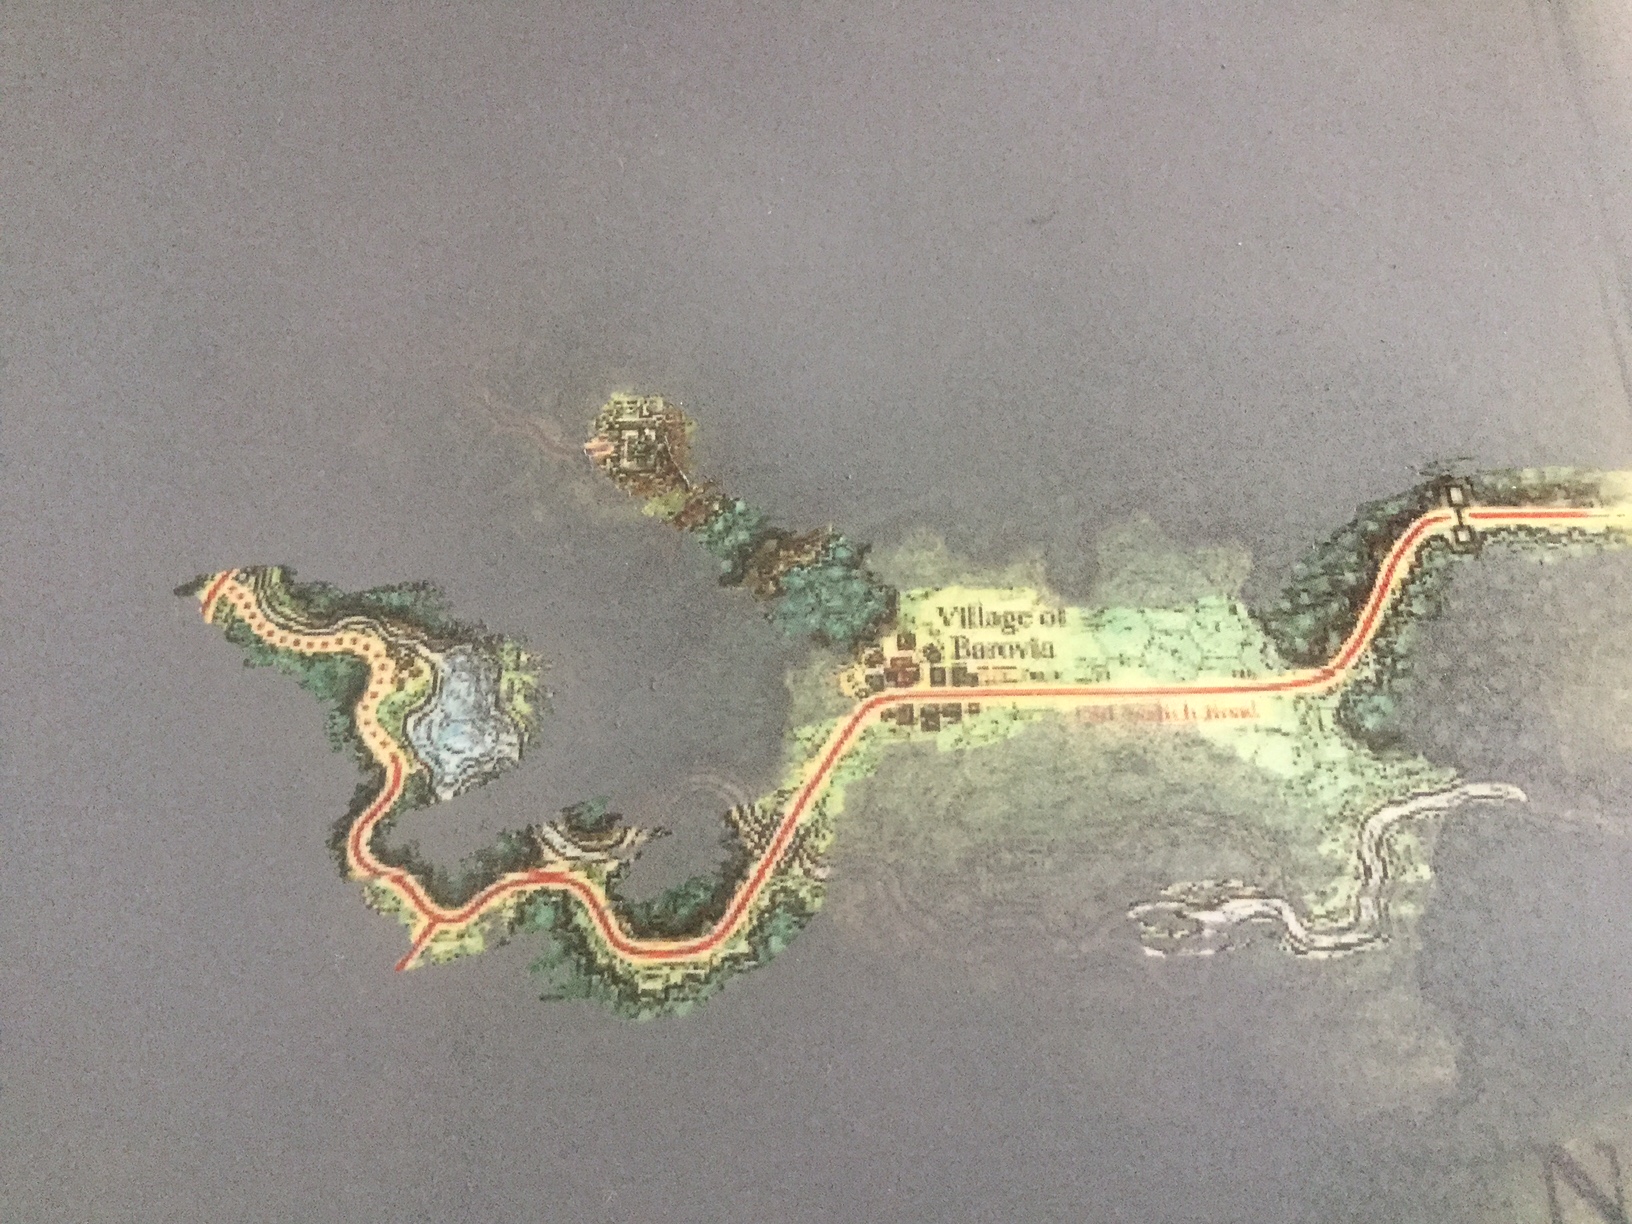
Tips and Tricks
The most important tip, I believe, is not to overuse this technique. When an area is too small, too bland, or just plainly visible (like a village, a single-chamber tomb, or an enemy encampment out in the open), don’t do it.
Also, remember that some things are visible from a larger distance—you should make these visible to the players, so they have the same reference points they’d have in real life (like Mount Bartok is always visible on my map of Barovia).
Remember you can also draw on top of the paint layer! Draw a circle around where the local rumours say the monster has its lair and have the PCs navigate there—much like a Skyrim quest marker!
Lastly, if the PCs manage to get themselves lost, call for a fifteen-minute break and simply re-cover their map with paint. Clearly, they should have shelled out the copper for that NPC guide…
Creighton’s Commentary
This is a guest post by Bart Wynants.
I think this is a genius idea, and I wish I’d thought of it myself. As Bart says, mapping can be a real time suck in the game. Bart’s system almost completely kills that wasted time and lets us get on with gaming better!
Thank you, Bart, so much for coming up with this idea and writing it up for the blog. Let us know what your think of Barts idea, by leaving a comment below!
About Bart Wynants
Like so many gamers my age, my first brush with the hobby started with the discovery of HeroQuest, in the early 90s.
I was always the kid who played the bad guy (Morcar!) and it seems I’ve been stuck behind the DM screen ever since. Currently, I’m running three campaigns: the homebrew world of Grey Dawn (Pathfinder), Curse of Strahd (5th edition) and… the megadungeon of Karak Uzgul (based on the classic HeroQuest game system, no less!).
When I’m not running games or painting miniatures, I’m living the bold and adventurous life of an IT consultant. I try to spend any remaining time with my lovely wife and our pint-sized dog.
My current goals are to perfect my mead-brewing process, to finally write that novel, and to retire to the German countryside. Preferably in that order.
Ok, _that_ is a really good idea!
I use this very same technique but with a twist. I love to draw maps, sometimes I don’t have the time for it though. Fortunatelly there’s a huge amount of free and custom material everywhere on the web. Instead of laminating and illustration I oftenly use acetate sheets, you can draw on them with sharpies, and even coat them with a mixture of one part acrylic paint, one part dish soap. This mixture also works perfectly as a fog of war that can be scratched out.
An interesting idea. I may give it a go and send you my thoughts.
I have to say, that is probably one of the best ideas related to mapping that I have ever come across. Genius!
Great idea ! Funny since Goodman Games just released scratch-off character sheets this past year. I never thought to apply the same idea to maps. This will be not only a great time saver, but also it will help to keep the flow and mood of the game going. I plan to use it in my new Greyhawk campaign. Thank you very much for the great idea.
This is a brilliant idea! I love it.
Awesome idea! My group I play with is also doing Skull & Shackles. This method would be awesome for a map of The Shackles while they sail around looking for things.
Absolutely, Robert! I can see this being an awesome way to do ocean or land-based exploration. I could see Kingmaker being a blast using this kind of exploration! (And I’ve also forwarded the article to my Skull & Shackles GM).
😉
Is scratching notably quicker than GM drawing on a dry-erase flipmat? I can see that the revealed ma p may well be prettier. I tend to (a) give the players the wilderness map and (b) draw out the dungeon as they explore, 5′ to the ” on the flipmat(s), so it can be used for combat at any time.